Fasting. Authentication. Inquire. Repeat
Cliff
<insert long winded childhood foodie love / fantasy / crush / salivating food-porn story here>. Ingredients & Pricing Makes five (5) serves per batch. 250g of riced cauliflower; cooked in microwave (3 minutes on high). ($2 for a larger-than-average head). Approx. 50 cents used up. OR 35g of Lupin flour ($5.65 for 400g satchel). 56 […]<insert long winded childhood foodie love / fantasy / crush / salivating food-porn story here>.
Ingredients & Pricing
Makes five (5) serves per batch.
- 250g of riced cauliflower; cooked in microwave (3 minutes on high). ($2 for a larger-than-average head). Approx. 50 cents used up.
OR
35g of Lupin flour ($5.65 for 400g satchel). 56 cents used up. - 2x whole egg. (one 12x 600g carton of egg = $2.00 - $2.50). 37 cents used up.
- 110g of flavoured whey or pea protein powders OR COMBINATION OF BOTH. The most dominant flavoured you use will be the flavour you'll end up with ($30-$32 per kg). $3 used up for whey, or about $1 for pea proteins if you can get it from Kakulas® at $9 per kilogram. Say $2 for loose approximation average combination (Pea + Whey Proteins) used up.
- 100g of pumpkin puree (instructions below). (one whole pumpkin $1 per kilogram). Approx 10 cents each used up.
- Pinch of both baking soda and cream of tartare / potassium bicarbonate. ($4 for up to one months constant approx usages).
- Two levelled teaspoon of 100% granulated Stevia or a teaspoon of pure Monk Fruit powder or any other Sucralose-based sweetener of your choice. Amount will obviously vary especially if there's errythol used. (pricing varies, let's just use 15 cents used up as gross approximation each serve). Say $12 per initial container investment for gross approximation sake.
- Non stick, non-gmo Canola Cooking oil spray. ($3 for an entire month use; if not more).
- Up to 250ML or a glass of water <sarcasm>***$2,500 - $ ∞ per month***.
***We are still not in a Resource Based Economy yet. Technically speaking, whether you own a mortgage or are renting - water, gas or electricity - are still not "free". We'll assume it as "free" anyway for the time being.</sarcasm>
Tallying up the price - it takes between $53 to $63 AUD as "RECIPE INITIAL INVESTMENT". And it takes between $3.25 (realistic minimum) to $4.80 (hedonic-desireable maximum) to make each batch. You could make up anywhere between eleven to fifteen batches.
So if you earn a comfortable $AUD60,000 per annum; that leaves you (assuming paying a monthly mortuary-gauge aka. “Death Contract” of $2,500) = you’ll be left with $1,200 as leftover “leverages” out of net payment of $3,700 per month. Say hypothetically after up to $600 (let’s use this as most-expensive scenario) used worth of ALL bills billed per month, you could still have up to $600 worth of “discretionary” income per month to yourself.
$600 per month divided by $60.00 (as per "Recipe Initial Investment") would give you up to TEN batches.
So, (at minimum) TEN batches times five serves each = 50 serves. Not bad.
Execution.

1/4 The pumpkin puree
Preheat your oven to 200 degree Celcius.
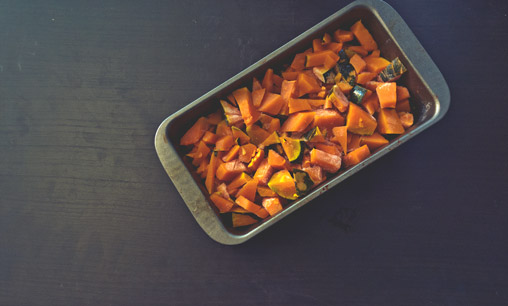
Slice and Cube up pumpkins. Wash but also pour in a bit of water into a non-stick pan (do not completely submerge but only somewhere quarter covered). No need to spray any oil. Dump straight to the oven for 30 minutes. After 30 minutes give a quick stir around, and bake for a further 30 minutes or until everything arrives at a somewhat mushy consistency.Use a potato masher or simply a spoon to determine this.
At this stage, prepare your blender and just blend everything to smithereens. Be prepared also to add more water to make sure that your consistency close arrives to that of a tomato-paste like consistency. Not too runny, but definitely no sludge either.
Store this pumpkin puree in the fridge for up to week. Take out about 100g portion for this whey / pea protein cauliflower slice.
2/4 The slice mixture.
Preheat the oven to 200 degrees. That's right. Unlike those advocating less - my experiences dictate the opposite.
If you haven't already done so; get a head of cauliflower weighing 300g approx. Cube and blender to rice-like granules. Microwave for 3 minutes on highest setting.
3/4 Blend
Meanwhile dump all ingredients into a mixing bowl. Get your electric mixer out and blend. I recommend to actually "hand-mix" slowly first for a few seconds or until all things are clumped neatly together and then turning on the power. Otherwise, many bits will go all over the place too soon.
Blend for about no more than 40 or 50 seconds.
Take note however if you are using SOLELY PEA PROTEIN ISOLATES. Pea proteins can be difficult to mix properly unless if you add in water.
Pour the water in up to a glass or even up to a glass and a half as you blend the mix; until you achieve a thick cream or paste like consistency. Achieving this "ideal" thickness is hard to describe. You must somehow aim for it to be arriving somewhat as thick as a "sludge" but still runny enough for it pour down. Best analogy for this would be to imagine pouring gobbles of thick raw honey.
Once the cauliflower is steamed out from the microwave, put into the mix and blend again for about 40 seconds.
Generously spray a baking tray with a non-stick spray (I'm using a non-gmo Canola).
4/4 Bake.
Then, it's time to bake. Bake for 30 minutes at preheated 200 degrees celsius. After around 20 minute you should ideally be seeing a "rise" of the entire loaf. After around 25 minute mark - try poking through the loaf with a knife or a toothpick.
Once it comes out "clean" without stickiness then it is sufficiently done. If not, continue baking again for another 10 minutes and re-assess. Another test worth considering is to gently poke the surface with your finger. It should be ideally somewhat firm.
Gently run a knife alongside the edges of the baking pan to help separate the bake apart and tip over the contents safely.
Once everything looks good; DO NOT serve right away. You must let it settle and "dry" to room temperature or fridge it for at least two hours to get rid of any excess mushiness.
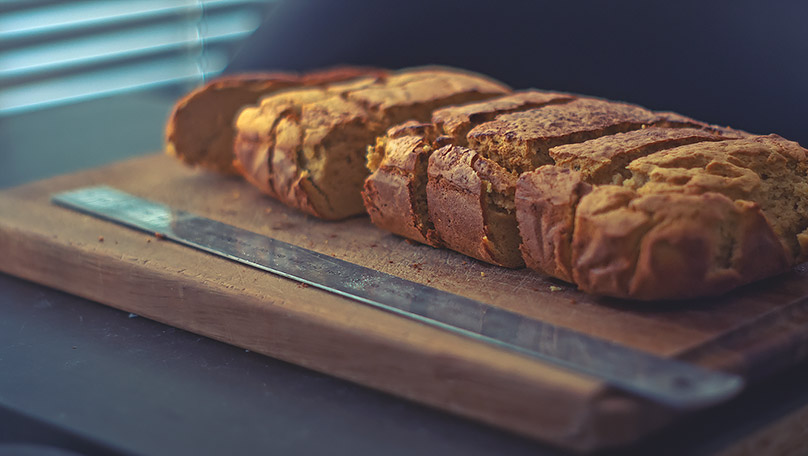
Then cut. Gently reheat (if previously stored from fridge) and serve.
World Peace.
Macros
Cauliflower version
If you are using the Cauliflower version the entire loaf comprises of 682 calories. 23g of carbs (excluding 8g fibre), 17g of fats, 111g of protein. If split into five (5) serves you will get 130 calories, 5 grams of carbs, 22g of protein, and 3g of fats.
A reminder once again - your protein brand and its nutrient specs may vary the overall macros. Some may have added carbs some don't.
Lupin flour Version.
In my thus far three weeks of stress & $$$ sacrifice experiments, this holds better than cauliflower.
Lupin flour is a supposedly low carbohydrate (only 9 grams of net carbs per 100g) with higher protein content (40 grams of protein per 100g). Interestingly fits well enough for anyone within HFLC / Keto regiment whilst also trying to increase their overall fibre intake.
Just beware however, over its allergenic potentials similarly to those of peanuts.
The great thing about Lupin flour is its' already somewhat high protein content; enabling you to use up LESS wheys & pea protein powder supplies. In this lupin version therefore; I have been only using 90 grams; as opposed to 110 grams. Twenty grams difference may seem minuscule to you but keep in mind we're talking about making a full size batch here equating minimum of five serves each output.
The macros for this Lupin flour version (entire loaf) comes to 653 calories. 16g of fats. 14g of carbs (14g as fibre), 101g of protein. you Split into five serves each gives you 130 calories, 3g of fats, 3g of carbs (3g of fibre), 20g of protein. This is assuming you are using an evenly split (50/50) usage of both Wheys and pea protein isolates.
As usual, you can also add in psyllium husk to further up the fibre content if you wish. This I do not count towards my macros. Beware however at $6 per initial cost per 250 grams; a 35 gram usage for each batch will cost you a further whopping 85 cents.
When things go wrong...
Of course, what would be the point of sharing a "recipe" if all you see is success pictures and pretty-cherry picked "results"?
If either you find your baked results overly mushy or just ended up as a sticky mess; perhaps try these below. I had to go through many days of troubleshooting (not to mention $$$) just for me to prepare writing this section alone.
Hopefully upon reading this you'd save yourselves some hair for recovering your sanity in the kitchen.
1/3 Line your parchment paper correctly.
My prior baking habits always dictate me to just simply tear a parchment paper and just jam it in roughly and be done with it. Try instead cutting the paper manually with scissors to match AS CLOSE as it comfortably fits onto the base of each pan. And then spray it generously with a non stick spray (I am using a non-gmo Canola).
Below is a smaller size bake (using 55g of combined whey chocolate casein (27g) + pea protein (27g), 50g pumpkin puree, 1 egg, and 35g of lupin flour). Begin by ensuring you cut your baking sheet just for it to comfortably rest at the bottom. Spray it evenly with a nonstick cooking spray, pour mixture and bake for 30 minutes at 200 degrees. Mine turned very well done at 20 minutes. Run a knife along the edges of the pan before you can tip everything over and out safely.
2/3 Watch your water levels during blending.
This applies to wherever there's pea protein isolate somewhere in the mix. Even if you mix with whey to prolong resource availability.
When blending everything be sure that you add in water one pour (half of IKEA® glass) at a time; just enough to enable some blending for few seconds. Then pour some more water again (up to another half) before blending again; this slightly longer for about a full minute. Assess the overall consistency.
If it is too runny it is most likely be ending up too mushy. If it is too hard and resistant like-chunks - it may even cling and stuck to the sides of the pan.
3/3 For a bit of hack, try adding milk AND bit of a soda water
This obviously will not turn to low carb friendly meal. You could try adding up to 150ML milk with a bit of soda water whilst blending instead of just plain water. Obviously this will add up the carb count due to the milk. You need to factor in this additional carbs manually on your own recipe within Myfitnesspal.
If "Money" is no object to you then buy egg whites.
There is of course, other means and avenues to prevent the above problems; one being the most likely preached would be to simply buy and use liquid egg whites. The above shot gives you an idea what it looks like. Notice the more whiteness it gives - the firmer the result due to the egg whites.
But given how horrendously expensive they are ($5 for 500ML) they remain only somewhat reserved for the elitist few. This will require you to add a hefty $1 for each and every batch (100ML used) to make.
--
